Tips & Tricks
Preparing for Your New Waterjet – Part 1
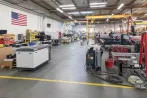
Adding a new waterjet to your shop is exciting. You can hardly wait to get your new machine up and running so you can expand your manufacturing processes. But before installation begins, you need to prep your space and do some housekeeping in order to make the process as quick and easy as possible. In this 2-part series, we'll take a look at process in installing a new OMAX Abrasive Waterjet.

Review Documents
To ensure a smooth and timely installation schedule, review the pre-installation checklist and familiarize yourself with the utility and lifting requirements for your new machine. Once you know the electrical capacity necessary to power your waterjet, you can have an electrician audit your shop to make sure you have the voltage and amperage you’ll need.
Electrical
Prior to the arrival of the technician, you will also need the help of an electrician to run power connections to the location of your future waterjet pump. Where you put this piece of equipment depends on whether you’re following the standard footprint or using a custom location you have discussed with your sales representative.
Water Considerations
Water is an obvious utility you will need for your waterjet, and the colder your water, the better it is for your machine. Check your water temperature when you’ve having it tested for suspended solids to ensure the best component performance. If your water is on the warmer side, you may want to consider installing a chiller to increase the life of your pump’s seals.
Drainage
The next step is to determine your drainage plan. Since water will be added to the catcher tank at an average rate of one gallon per minute during cutting, proper drainage is required to prevent flooding. The drain water has no chemicals or contaminants in it, so it is typically allowed into the city sewer system – but some jurisdictions are more strict than others. It is always best to confirm with your local authorities in advance so you can begin cutting as soon as possible by taking advantage of the free training provided by the technician doing the install

Floor Prep
Once electrical, water, and drainage systems are prepped and ready to go, you need to check the floor in the location your waterjet will be located. A completely level floor will ensure the highest accuracy and repeatability in cutting. Even if your floor looks level, many floors are off by between a half inch and an inch and a half. If your machine level is off by more than an inch, imagine what part tolerances will look like as the cutting head moves up and down that incline.
Not only will an unlevel floor throw off your tolerances, it could potentially warp your tank and twist your drive systems when water is added. One gallon of water weighs approximately 8.3 pounds, and a 5' x 10' cutting tank holds more than 1,500 gallons, which amounts to over 13,000 pounds. Laser your floor to determine the leveling point, or at the very least, take a large level and determine the high and low points.
Once you have mapped out the low points of your floor, use epoxy to even out the area and bring it as close to level as you can. Be sure to give the epoxy enough time to dry and cure before the machine is put in place.
Now that your space is prepped, a technician can be scheduled to install your new waterjet.