Tips & Tricks
Precision Practices: Tabs and Bridges
OMAX waterjet machines are designed for high-precision machining. A combination of meticulous mechanics, rigid construction, and velocity control from the software ensures the highest degree of precision in the parts. Even with all that precision built in, you, as the operator, are able to hone that precision further by implementing a few fundamental practices. Last month we discussed homing your machine. In this installment of Precision Practices, we will be looking at tabs and bridges.

Tabs
Tabs are small pieces of material that hold parts to prevent them from sliding into the tank or being moved by the abrasive jet. They are mostly used with thin materials (because a tab in thick material can be difficult to break). Programming a tab into a tool path allows for several advantages.
- When using a tab, assign the quality of the tab to lead-in/lead-out. This will cut the tab at an optimized pierce while allowing efficient tabbing. Similar to lead-in/lead-outs, placing tabs at the corners of a cut path will allow for the elimination of a slower corner to cut, thereby decreasing your overall cut time. For more information on lead-in/lead-out check out the earlier article, Precision Practices.
- Tabs are important in precision work because they keep the cut piece from shifting around when it is freed of the parent material. There is a narrow window of operation when the part comes free of the parent material to when the jetstream is disengaged. In that window, the part may shift and be marred. With a tab, a finished part is not truly free of the parent material, keeping rigidity.
- Tabs are used to keep small cut pieces from falling into the tank. Slats are great at holding larger cut pieces out of the water. But if the finished piece is smaller than two inches square, there is a decent chance that, if it comes free of the parent material, it will fall into the tank. Though recovering a small part isn’t difficult when it falls into the tank, removing it can be time consuming.
To create a tab in IntelliMAX’s LAYOUT, Right-click the Lead i/o button and select Create Tab. The Tab Tools toolbar button displays and the cursor changes to the tab cursor. Then simply click where you want to create the tab. The tab appears at the closest entity to where you clicked and on the same side you clicked. You may wish to experiment with different tab qualities and geometries based on the particular material you are going to cut. For this reason, the tab tool has settings that can be adjusted.
Bridges
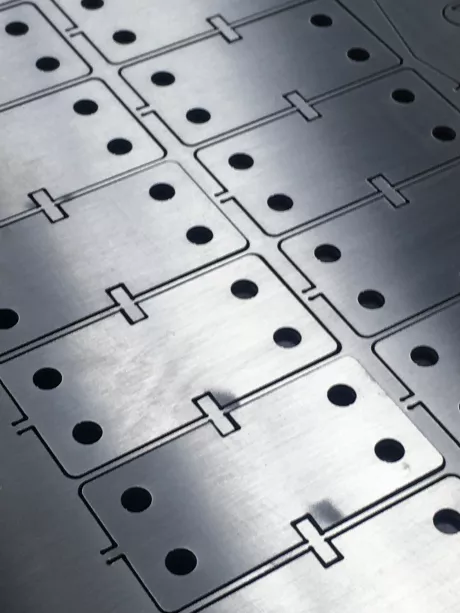
A bridge is similar to a tab, except that a bridge connects individual parts to each other rather than to the parent material. Like a tab, a bridge prevents parts from falling into the tank. The added benefit of programming bridges is that it can reduce the number of pierces needed to cut the finished parts. Reducing pierces speeds up cutting as well as mitigates potential blemishes at the pierce points. The image below is of a series of rings bridged together. The perimeter of this part was cut with a single piece.
To create a bridge in LAYOUT, right-click the Lead i/o button and select Create Bridge. In the Bridge Setup toolbar, click Options to display the Bridge Entities dialog.
As you drag the cursor around before clicking the mouse to create a bridge, notice that the bridge will “snap” when you get close to a corner. Bridges can be angled or straight. The break point can be configured to be at the part, or the midpoint, depending on your needs.


